This is a User Guide (wiki)for Open Enventory. The links to the software (original version by FR, and forked version by KV) are on the top bar.
About Open Enventory
Open Enventory is a free, open-source () programs for chemical inventory and electronic lab notebook. It combines:
a lab notebook,
a database for all spectroscopic data,
The goals of Open Enventory are:
to make unnecessary and boring tasks in the laboratory obsolete: searching for chemicals, price surveys.
to make knowledge accessible inside and outside (if access is granted) the workgroup, for longer periods.
to improve working safety be easily accessible safety instructions.
Currently, Open Enventory can be used in German, English, French, Spanish, Italian, and Portuguese. Additional language files and modifications can be created with little effort.
Sources:
Why would you want to use Open Enventory?
Please see the following presentation for a brief intro into Open Enventory, why you would want to use it and some of its functions:
Click the link below to download the presentation:
Screenshots
Demo page
Official demo site for:
-
-
Contribution
This guide will be updated periodically.
If you want to contribute, you can create an account to generate or edit this guide. Please follow this .
If you have some documents or guide or videos and want to contribute and do not want to make the page yourself, please feel free to send it over to KV using the contact page:
You can contact Dr. Khoi Van (modified version of OE), at this email: knv88@pm.me or Twitter
For the original Open Enventory:
you can contact Felix Rudolphi, the creator:
Database
Create a database
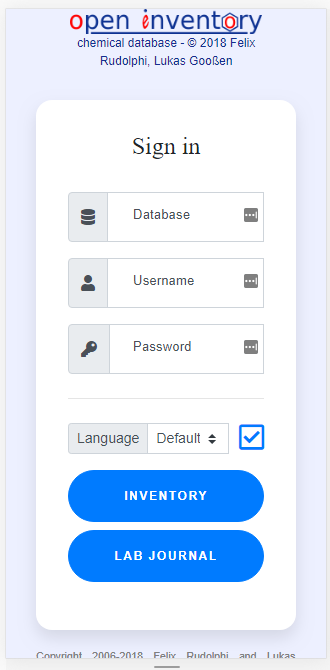
1. Go to your Open Enventory Login page on your web browser
2. On the Login page, fill in the following info:
- Database: name for the new database
- Username: root
Database Backup and Restore
This is procedure to backup Open Enventory database and restore it later on the same server or migrating to a different server
For traditional LAMP stack
This guide is for Linux environment with Apache2, PHP and MariaDB (MySQL) (LAMP) stack:
Best Practice for SQL Users Backup
While the quick user backup as this one-line commandmysqldump -u [user] -p mysql > [Path]/[user_backup_filename].sql might work when you have same version for backup and restore SQL. In most cases, you want to implement something similar to the following bash script
Backup Users
Step 1: On your server, in terminal, prepare the following bash file using vi (or vim or any text-editor of choice)
Step 2: Paste in the content of the file as follow:
PASSWORD : change to your root password or the password of the user that you use for the backup process. If you don't use root then change root on line 8 to your user
path : use your specified path to the output file
oe_backup-user-$(date +\%Y\%m\%d).sql : the output file will have the current date concatenated at the end of the file
This script above also not save oldroot user info or empty users. You can change it by modify the code on line 12
Step 3: make sure you (or the user that run the mariadb_user_backup.sh file has the sufficient permission (i.e. chown) and make the script file executable:
Step 4: Execute the script file to obtain the user backup file
If your new SQL server is newer than your old one, after importing both database(s) and users, you can run the following command in terminal to upgrade MySQL:
vim mariadb_user_backup.sh
mariadb_user_backup.sh
#!/bin/sh

# This bash script is used to save users and permission from mysql database.
# Ref: https://stackoverflow.com/a/57878326
# explanation: https://wisdmlabs.com/blog/migrate-mysql-users-one-server-another/

HOSTNAME="localhost"
logininfo="-u root -pPASSWORD"
outfile="/path/oe_backup-user-$(date +\%Y\%m\%d).sql"

# The line below will save all users except 'root', empty name and specified ones
mysql ${logininfo} -B -N -e "SELECT CONCAT('\'',user,'\'@\'',host,'\'') from user where user != 'root' AND user != '' AND user not like 'auto%'" mysql | \
while read uh
do
   echo "SHOW GRANTS FOR ${uh};"
done | mysql ${logininfo} -B -N | sed -e 's/$/;/' > ${outfile}
chmod u+x mariadb_user_backup.sh
./mariadb_user_backup.sh
mysql_upgrade    # Upgrade MySQL data
systemctl restart mariadb   # Restart mariadb
a chemical inventory and
a literature database.
It is designed for the requirements of university groups and small companies, focuses primarily in Chemistry research.
It is operated in the web browser (Edge, Firefox, Opera, Apple Safari, Google Chrome) and is therefore platform-independent. The integration means that physical data and safety information from the inventory can be used automatically in the laboratory journal. The automatic query of freely accessible substance data from online chemical catalogs saves manual data entry and catalog searches. Access to the catalog data also enables a price overview to be created with a click of the mouse.
The laboratory journal uses the data from inventory management and makes the results accessible to all members of the working group. Both inventory and laboratory journal allow the data to be shared with other working groups for the purpose of collaboration.
to reduce waste amounts and unnecessary costs by an easily searchable inventory database.
Change `database-name` in this picture to name of the new database that you want to create
3. Open Enventory will then create a new empty database
Connect databases
This allows for users in one database to see chemicals in another database and/or vice versa.
Note: in the default setting, OE only allows user in one database to see if other databases have chemical(s) but not revealing the chemical's location.
If you want to let users in one database to be able to see location of chemicals in another database, after connecting the databases, please follow the instruction in this link.
1. Go to your Open Enventory Login page on your web browser
2. Log into your database of interest using root as Username and your mysql root password as Password
Change "database-name" in this picture to name of the database of interest
3. Go to Settings on Top menus:
4. On the left side menu, choose Manage databases :
5. There are two types of connections:
2-way connections: users in one database can see/search chemicals in another database AND vice versa
1-way connection: users in one database can see/search chemicals in another database BUT NOT vice versa)
choose the desired connection and follow the instruction below.
Step 1: Choose as databases that you want to connect (hold Ctrl while choosing). You can choose more than 2. Click select all if you want to connect all databases
"romo" and "romo_test" are 2 databases that will be connected
Step 2: Click the button Connect selected databases
Step 3: Click the green check mark ✅
Using the rubric table, the databases with name in the bold format and listed horizontally in the first row of the table will be able to see/search chemical in database(s) (list vertically in the first column) that has checked check box
For example:
In the picture below, users in romo database will be able to see/search chemicals in romo_test database BUT users in romo_test database will NOT be able to see/search any chemicals in romo database.
Step 1
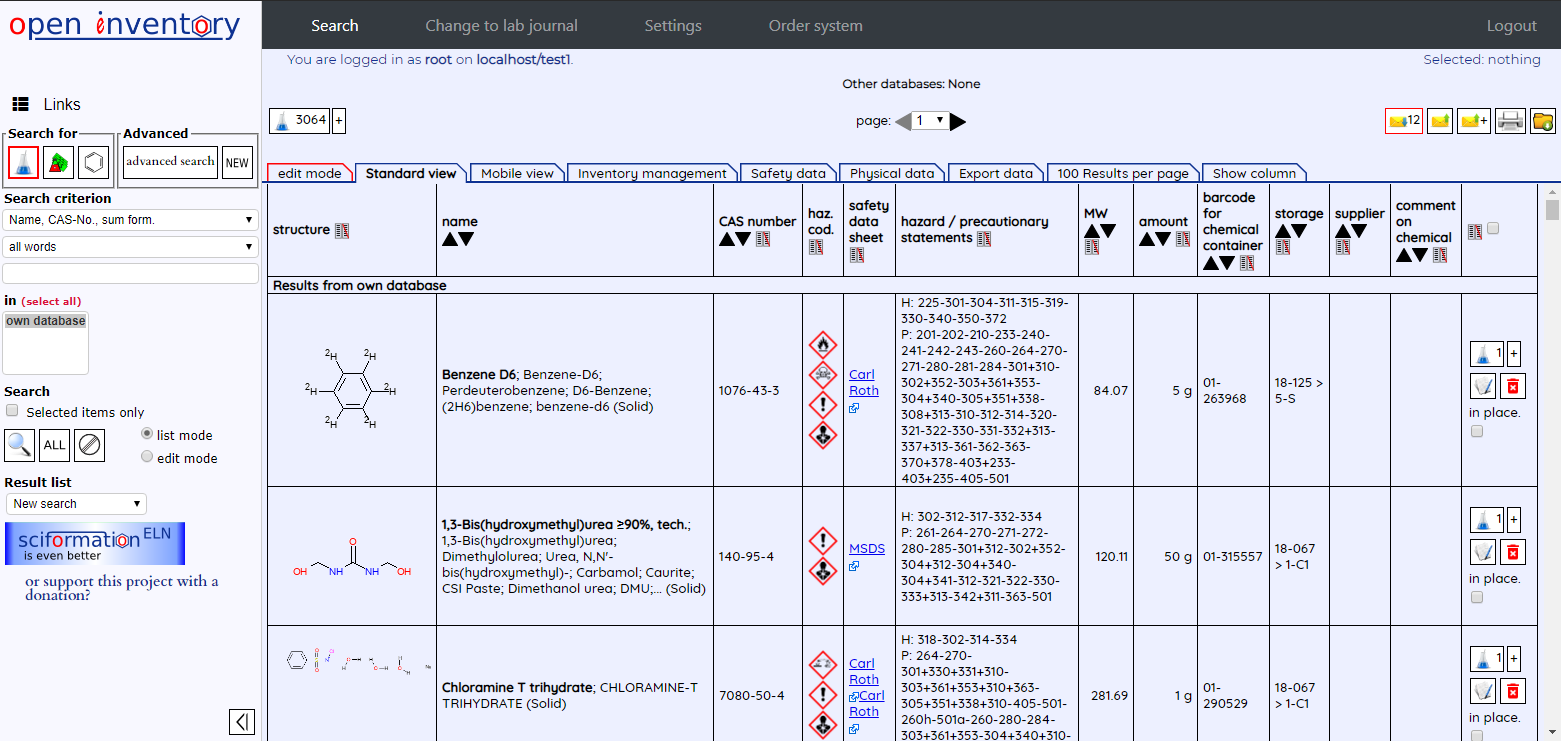
Done! You can now search chemicals in other database(s) in the search page
Save or Backup Database(s)
For chemicals and lab journal databases:
1. In Terminal window, type the following command:
Replace [italic_text] (including the square bracket) with specific info:
[user]: in most cases, use root (recommended)
[database]: use the name of the database that you want to backup
[Path] and [backup_filename] : any path and filename
If you want to compress the SQL backup files, you can use this command instead:
| xz was added for compressing SQL file to .xz file
Make sure that you have .xz at the end of the file as above.
.xz files seem to have the best compression vs bzip2 and gzip for SQL files. You can see more info and :
For example usage of xz, see this .
2. Type in password for the user above and then Enter (nothing will show when you are typing the password)
For users info:
1. In Terminal window, type the following command:
Replace [italic_text] (including the square bracket) with specific info:
[user]: in most cases, use root (recommended)
[Path] and [backup_filename] : any path and filename
While this approach might work well in case of same MySQL or MariaDB version, if you migrate or upgrade SQL, you want to follow the instruction here for better users backup:
2. Type in password for the user above and then Enter (nothing will show when you are typing the password)
Restore
Step 1: transfer both files (database and users, if you want to keep the same users and passwords) to the new system/server
If you have compressed the SQL file as instruction above, you will need to decompress the file first.
This is for compressed file with .xz extension:
-v : verbose, give more info
k : to keep the compressed file, this will generated the uncompressed file .sql
Step 4: use ssh and terminal, login as terminal root and run:
Replace [italic_text] (including the square bracket) with specific info:
[database-name]: use the name of the database that you want to backup
[/path/backup-database]and [/path/backup-user]: any path and filename
Step 5: go to OE on web browser and login with mysql root account.
If the mysql root user in the old database has password different than the current mysql root user, after step 3 above, the root user password will be changed to the old password.If you don't know the old mysql root password, follow this tutorial to reset mysql root password.
Step 6: go to Settings and then click on Recreate users. That should reactivate all users and their passwords.
Again, if you have migrate from MariaDB < 10.4 to MariaDB 10.4+, it might not work and we have to change the command in step 3 above. The reason is because the mysql.user table is deprecated in MariaDB 10.4. You can read more about it here.
For XAMPP users
While the general steps are similar, the exact paths to the executable command are different for Mac OS and Windows using XAMPP, please follow the corresponding guides below:
Save or Backup Database
For chemicals and lab journal databases:
1. In Terminal window, type the following command:
Replace [italic_text] (including the square bracket) with specific info:
[user]: in most cases, use root (recommended).
2. Type in password for the user above and then Enter (nothing will show when you are typing the password)
For users info:
1. In Terminal window, type the following command:
Replace [italic_text] (including the square bracket) with specific info:
[user]: in most cases, use root (recommended).
2. Type in password for the user above and then Enter (nothing will show when you are typing the password)
Restore
Step 1: transfer both files (database and users, if you want to keep the same users and passwords) to the new system/server
Step 2: if you have not done so.
Step 3: use ssh and terminal, login as terminal root and run:
Replace [italic_text] (including the square bracket) with specific info:
[database-name]: use the name of the database that you want to backup
Step 4: go to OE on web browser and login with mysql root account.
If the mysql root user in the old database has password different than the current mysql root user, after step 3 above, the root user password will be changed to the old password.
If you don't know the old mysql root password, follow this tutorial to .
Step 5: go to Settings and then click on Recreate users. That should reactivate all users and their passwords.
Again, if you have migrate from MariaDB < 10.4 to MariaDB 10.4+, it might not work and we have to change the command in step 3 above. The reason is because the mysql.user table is deprecated in MariaDB 10.4. You can read more about it .
Save or Backup Database
For chemicals and lab journal databases:
Download
Download site
You have 2 versions to choose from:
KV's modified version. Improvements or changes in this version compared to Felix Rudolphi version is here.
mysqldump -u [user] -p mysql > [Path]/[user_backup_filename].sql
mysql -u root -p [database-name] < [/path/backup-database].sql    #for database restore
mysql -u root -p mysql < [/path/backup-user].sql    #for users restore, this might not work for mariabd 10.4+
[database]: use the name of the database that you want to backup
[Path] and [backup_filename] : any path and filename
[Path] and [user_backup_filename] : any path and filename
[/path/to/backup-database]: any path and filename
1. Open a Window Powershell window, type the following command:
Replace [italic_text] (including the square bracket) with specific info.
[user]: in most cases, use root (recommended).
[database]: use the name of the database that you want to backup
[Path] and [backup_filename] : any path and filename
In the command above, this part is for the default XAMPP set up. If some error happens, you should find the executable file inside XAMPP folder in your system. You can try to follow this link.
2. Type in password for the user above and then Enter (nothing will show when you are typing the password)
For users info:
1. In Terminal window, type the following command:
Replace [italic_text] (including the square bracket) with specific info:
[user]: in most cases, use root (recommended).
[Path] and [user_backup_filename] : any path and filename
2. Type in password for the user above and then Enter (nothing will show when you are typing the password)
Restore
Step 1: transfer both files (database and users, if you want to keep the same users and passwords) to the new system/server
Step 3: use ssh and terminal, login as terminal root and run:
Replace [italic_text] (including the square bracket) with specific info:
[database-name]: use the name of the database that you want to backup
[/path/to/backup-database]: any path and filename
Step 4: go to OE on web browser and login with mysql root account.
If the mysql root user in the old database has password different than the current mysql root user, after step 3 above, the root user password will be changed to the old password.
Step 5: go to Settings and then click on Recreate users. That should reactivate all users and their passwords.
Again, if you have migrate from MariaDB < 10.4 to MariaDB 10.4+, it might not work and we have to change the command in step 3 above. The reason is because the mysql.user table is deprecated in MariaDB 10.4. You can read more about it here.
Update (2020-02-01): KV's version of OE (on and after 2020-02-01) now accepts:
Excel files (*.xlsx and *.xls)
Comma-separated files (csv)
Tab-separated files (*.txt).
Prepare the Excel file, an example might look similar as below. A few important things:
Columns that are highlight in blue are important info.
You don't need all of the info that show in this example.
Empty cells are OK.
The amount need to be “xx Y” with xx is the amount and Y is the unit.
For unit, it is best to have all in lower case, for example, “ML” should be either “ml” or “mL”. It is best to convert all unit to lower case (use lower() command in excel).
Double check the CAS number column, Open Enventory uses CAS number as primary source to look up chemical info from the internet.
See step 9 for more info about each column in the excel sheet.
2. Login into your database using root user or any users with admin permission
3. Go to Settings
4. Go to Import Tab-separated text file (or Import in KV's version)
5. Choose Browse… and choose the exported text file.
Note: in Lines to skip, put 1 if you have a header rows, if not, choose 0
6. Click green check mark
7. Screens as below should show up, you can scroll down to see if they show up correctly (info appear correctly in each row)
8. Choose Column X for each content. If you choose None, that column will not be imported. You can also add a default value for each column that will apply for ALL items being imported.
Notes:
CAS number: most important info, OE will use this to look up other info (structures, MW, safety data, etc) from this cas #
Name: not too important
Empirical formula: do not import this since OE will use this to find the closest chemicals if CAS# is not present or wrong.
Amount: = size of the bottle + unit (format should be #+space+unit, for example: 5 g, 125 ml, 1 kg, etc)
Still available: the amount that left in the bottles (OK if not imported)
Locations: important. Note: Each location will have its own barcode
Compartments: = sub-location. Note: each compartment does NOT have its own barcode
Barcode: if you already have an existing barcode system, add it here.
Suppliers: = suppliers
Date open: could be in European style (dd.mm.yyyy) or American style (mm/dd/yy, etc.)
9. Click green check mark. Screen similar as below should show. Note: line X:… will tell you which lines in the text file is being imported.
10. Depend of how many chemical containers are imported, this might take a long time, so please be patient.
Demo video
Author: Nathanyal Truax, Baylor University. You can check out his Youtube channel for other useful videos.
Step 1: choose what type of search: e.g “names, cas, supplier #”
Step 2: choose options: e.g. allwords,contain(~similarto),exact
Step 3: type is your search query, this can be name, CAS, supplier #, best with CAS and name
Step 4: choose database(s): choose one, or several (holding Ctrl while Left-click, or All databases (default)
Step 5: click Search
Video demonstration:
Searching Chemicals in Supplier Mode
Note: when Supplierssearch mode is on (see add chemical via suppliers), Open Enventory search includes chemicals from the local database(s) first
Supplier search mode
Search Chemicals using Structure
The default drawing program in Sciformation Vectormol. You can choose a different program by going to: Settings/Settings/Molecule editing/ and change “Structure Drawing Program” to “ChemDoodle (Javascript)” (recommended).
Step 1: choose search with Structures
Step 2: draw structure
Step 3: choose options: contain, similarto,exact, etc.
Step 4: click search
If it appears that the search is not accurate in ChemDraw plugin, you have to active the ChemDraw plugin:
a) Right click on the background of the chemdraw drawing window
b) Help/Activate my ChemDraw Plugin
c) Input your activation info the same (from email) as what you did for installation of Chemdraw
Step 2: Click on the structure
Step 3: Depends on the type of info you want to edit, choose the corresponding tab below:
Click on ‘Go to molecule’ button to edit structure and structural info (MW, Formula, etc.)
Click on Edit button () to edit the info. (Or double click on any fields inside the Edit package area.
To change the lab related (person responsible, amount, etc.) info:
Click on Edit button () to edit the info. (or double click on any where around these info)
borrowing of chemicals by users from outside of the group (guests)
Currently, this function is only available in KV's version of OE2020-09-26 or above.
Details
The idea is each group should have one ‘user’ account designated for external users (users from outside of the group, guests). When someone outside of the group comes and borrowschemical containers, this account barcode should be scanned and following by the container barcode. This specific account (made by turning on a specific permission setting External borrow in Predefined permission) is set so that during checking out of a chemical container by this account, a pop-up window would open and ask for the specific info (borrower’s name, group, contact info, and the group member assisting during checkout). This info is then saved into the history entry of that exact checkout event.
Guide
Step 1: Create a new user, ‘guests_<database_name>’ for example.
While creating this user, choose the following ‘External borrow’ in the ‘Predefined permissions’
Step 2: Use this new account barcode in the OE barcode terminal. During checkout, a popup window like this should open to ask for more info:
The provided info will be appended to the history entry for that particular checking out event. Example:
Edit Multiple Chemical Containers
If your institution has this option turned on, you can edit a list of chemicals automatically.
To know if this option is turned on, please log into Open Enventory with an admin account, then choose Settings (Top menu). Then if you see Import and Edit via Text File (Left menu) then this function is turned on for your institution.
You first need to log in into Open Enventory with an account with admin permission
then:
Step 1: Choose Settings
Step 2: choose Import and Edit via Text File
Step 3: on the Import page:
Choose package in the table field:
Click on Choose file button to choose your prepared file
Choose the number of Lines to preview
Choose number of lines to skip (header lines)
Step 4: click the green check mark to start uploading the file
Step 5: match the appropriate column for each info
Most importantly: match Barcode for chemical container with the correct column on your prepared file. This is how Open Enventory use as ID of the container.
For chemical containers, it checks if the barcode exists in the current database, and not disposed:
If Yes, it will edit the info of that container.
Match the rest of the info in the red rectangle area as desired:
Preview of the data:
Step 6: click the green check mark
A similar screen as screenshot below should appear after success uploading
Move multiple chemical containers
Step 1:
Login into OE and extract the list of chemical containers that need to be move. You don't need all of the details for each container, just:
- CAS number
- Names
- Chemical container barcode: most important thing as this is the lookup point
Step 2
Open and add a new column with the name of the new location for each container. New LOCATION NAME MUST BE EXACT or OE would create a new storage location.
Skip this step if you want to move all of the chemical containers into the exact same location.
Step 3
Login into OE with an admin account if you have not done so in step 1
Step 4
Go to Settings > Import and Edit via text file
If you don't see Import and Edit via text file, you might not use the OE version by KV. If you did, you might need to enable it. See more at:
Step 5
Follow the process that is laid out in .
In Step 5 of , you would only need to choose the column for CAS number, Name and most importantly, chemical container barcodeand **chose the correct column for the new location for the storage_name
If you want to change all chemical container into the same new storage, simply typing the EXACT STORAGE NAME in the input instead of choosing the column for the storage_name
Borrow and Return Chemicals
In Inventory Mode
Borrow a chemical
Step 1: search for the chemical of interest (see Search chemicals section)
Step 2: click Borrow button
Return a chemical
Step 1: go to Borrowedchemicals
Step 2: click Return button
In Terminal Mode
Borrow a chemical for users of that database
This function only works for users and chemical containers in the same database. For cross-databases (guest) borrowing, please see the below.
❗Computer that connected to the scanner must be ON
❗Barcode terminal window must be ON and ACTIVE, if not log in with terminal username and pass or contact your local admin
❗ Active barcode terminal look like below:
Step 1: scan your own barcode
Step 2: scan chemical barcode
Watch the terminal window to make sure the info is transmitted/recorded.
Borrow a chemical for guest users
Currently, this function is only available in 2020-09-26 or above.
Step 1: Follow the following guide to create a guest account
Step 2: Follow the step above in
Return a chemical
❗ Computer that connected to the scanner must be ON !!! Barcode terminal window must be ON and ACTIVE
Action: scan borrowed chemical barcode
Note: you don’t need to scan the your own barcode beforehand. The scan on a borrowed chemical will return the chemical.
Note: if the chemical is free and nobody has logged in, scanning the barcode of that chemical will bring up that chemical’s info in the system.
Storages/Locations
Create a storage location
The user must have Storage Administrator permission in order to create new storage
Step 1: After logging into Open Enventory, click on Settings on the top bar navigation.
Step 2: click on Storages on the Left.
Step 3: click on the ➕ button
Step 4: after adding the info, click the checkmark ( ✅ ) button
Create a list of storage
TO DO: to be constructed
Modify a single storage's information, permissions
TO DO: to be constructed
Modify info for a list of storage
TO DO: to be constructed
Merge two storage locations
TODO: add line-by-line instruction
Delete a storage
TO DO: to be constructed
Create Multiple Users
Do NOT create a user with username starting with "auto". Any user with this kind of username will be deleted when linking databases.
You first need to log in into Open Enventory with an account with admin permission
Step 1: Choose Settings
Step 2: Choose Import
Step 3: download the User template and fill out the sheet according to the instruction.
This is a copy of the Excel User Import template. It is better to download the template from Step 2 above
Step 4: on the Import page:
Choose user in the table field:
Click on Choose file button to choose your prepared excel user import file from step 3
Choose the number of Lines to preview
Choose number of lines to skip (header lines)
Step 5: click the green check mark to start uploading the file
Step 6: match the appropriate column for each info
Step 7: click the green check mark
A similar screen as screenshot below should appear after success uploading
Users
User Permissions
Create a New User
Create a New User
If you want to create multiple new users, please see:
Do NOT create a user with username starting with "auto". Any user with this kind of username will be deleted when linking databases.
Change User Password
Change user password using an admin account
You first need to log in into Open Enventory with an account with admin permission
Delete a User
WARNING: this step is not reversible!
You first need to log in into Open Enventory with an account with admin permission
Set Up a Terminal User
SETTING FOR BARCODE TERMINAL USER
To have a barcode terminal client (stand-alone computer), create a user with permission as below and log in into OE using this user.
To create a new user, please see the following link:
Modify User Permission, Information
You first need to log in into Open Enventory with an account with admin permission
Step 3: click on Details button ( ) on the same row of the user you need to change password
Step 4: click on Edit button () (or double click anywhere on the info window)
Step 5: type in the new password and repeat
Step 6: Click on the green check mark: ✅
Change one's own password
First, open up Open Enventory in any web browsers. Your screen should look as follows.
After logging in you should see the general window for searching chemicals.
Click on the “Settings” tab top and center of the page (outlined with a red box below).
This will change the left side bar. At the top of the left side bar you should see “Change password” Click here (the button is outlined with a red box below).
Your screen should have two boxes as shown below. Fill in both boxes press the “Change password” button right next to the text fields and your password has been changed.
Step 1: Choose Settings
Step 2: Choose Users
Step 3: click on Delete button ( ) on the same row of the user of interes
Step 4: choose OK to confirm deletion
You can save link to this user as a bookmark for easy access, but less secure since the password is embedded in the address as below:
Example screenshot of successful uploading of multiple users
Choosing 'External borrow' in 'Predefined Permissions' for guests account
Popup window asking for more info during checking out of a chemical container by an external user
Chemical Container History entry log showing the provided contact info for guest users.
GIF image
Inactivate a User
Different than Deleting a user, this will not remove the user from the database. It only disable the user from logging into the database
You first need to log in into Open Enventory with an account with admin permission
Step 1: Choose Settings
Step 2: Choose Users
Step 3: click on Details button ( ) on the same row of the user of interest
Step 4: click on Edit button () (or double click anywhere on the info window)
Step 5: check Account disabled
Step 6: Click on the green check mark: ✅
Change Chemical Location
Go to an active Terminal on your Open Enventory page. It should look similar to the following page.
Moving one single chemical
Scan user barcode (will say you are logged in)
2. Scan chemical container (will now show chemical information)
3. Scan new location barcode (will now say “updated and location field will show new location”)
Moving multiple containers to the same location
Check the 2 boxes “Stock-keeping mode” and “Set storage for all following containers” (the “Set storage for all following containers” will show up after you check “Stock-keeping mode”). Note: you can check by mouse or use the “Barcode for stock-keeping mode” list from Settings menu.
2. In typical terminal window of database of interest. Login by scanning user barcode
3. Scan the 1st chemical containers
4. Scan the new location. The window will show the new location and say the 1st container “… updated”
5. Scan the 2nd containers, 3rd container, 4th container, etc.
6. When Done, uncheck “Set storage for all following containers”
Terminal Mode
All of the guides in this section require you to be in an active Terminal. Please contact your site admin for specific details on how to access a terminal page on Open Enventory.
A terminal site should look similar to this:
If you are an admin and need to set up a Terminal, please see the following page:
Go to an active Terminal on your Open Enventory page. It should look similar to the following page.
Without any user logging in, scanning a chemical container barcode will bring up that chemical info.
CentOS 7
This guide is created for new unmanaged VPS from A2hosting.com
OS: CentOS 7
Ram: 1GB
Hard drive: 20 GB
Bandwidth: 2 TB
INITIAL SETUP
Login into A2 account, service to find the following info:
2. Connect to server using ssh. If you are on a Mac, use Terminal and type in the following command. If you are on a Window, you can use CMD (if CMD does not work, google “connecting to ssh on Window” to find the program
: xxxx: port number
yy: username
zz.zz.zz.zz: ip or hostname
Select “Yes” if asked to continue connecting
If there is a problem, follow this link:
3. To secure your ssh and your server, set up new user and deactivate root login via SSH by following steps 2, 3, and 5 in this tutorial:
Install sudo by:
4. Optional: Setting up time by following this link:
5. Following this link to set up LAMP stack:
In step 3, replace this part:
with:
In step 4: choose PHP7.2
Follow this tutorial from steps 1-5, make sure instruction for specific steps as indicated above
6. Install the following packages to prepare for Open enventory
7. Create a “download” folder; download OE (get the exact link from website: ); unzip OE and copy to the right location:
8. Go to
With xx.xx.xx.xx: is the server’s ip address
9. The OE website should load like screenshot below
Database: choose the desired database’s name
Username: root
10. If successful, this page will load:
11. Modify .htaccess file
Modify the content of the file as in this screenshot. Important: these setting is for the server with configuration as indicated in the top of this tutorial
Save the file (hit Esc, type “:wq” and then Enter) and restart httpd service
12. Modify mysqld config:
Right after [mysqld], add:
Save the file (hit Esc, type “:wq” and then Enter) and restart httpd and mariadb services
You are done with the initial set up here. Open enventory is ready to be used at this time.
Dispose of Chemicals
Go to an active Terminal on your Open Enventory page. It should look similar to the following page.
Scan user barcode (will say you are logged in)
Scan chemical container (will now show chemical information)
Scan barcode for “Delete” (will say “data set will be deleted in 3 seconds, then deleted)
Notes: If you manually change data (not using the scanner) you will have to click “update” after changing the data manually (mouse and keyboard).
Honeywell MS9520 Barcode Scanner
Goal: Setting for adding prefix Ctrl-A. This is to remove all pre-existing data inside an input field
Instruction: scan every single barcode on the first column in this order from top to bottom
Step #
Scan barcode
Explanation:
1st Configurable Prefix = 175 : Left Crtl + 1 character
2nd Configurable Prefix = 065 : Letter “A”
Scanner will transmit <left CRTL Make> “A” <Left CRTL Break>
Getting Started with ELN
quick intro on how to start using Electronic Lab Notebook in Open Enventory
This tutorial was created by Nathanyal Truax, Baylor University
A brief tutorial of creating a new laboratory notebook and creating a reaction entry.
Create new notebook.
If you do not see the + button ask your admin to give you administrator journal privileges.
Generate reaction from scratch.
Generate reaction by copying existing reaction.
Add a new empty notebook page
Taotronic Wireless Barcode Scanner
This is for this scanner:
For OE original barcode, add Prefix ESC
For existing barcode, add Prefix: [l_shift_on]+[Home]+[l_shift_off]
Windows
Step 1: Install this XAMPP from
Step 2: Copy/extract Open Enventory files into C://XAMPP/htdocs/ . Write down the folder name because this will be the web address. In this case the folder is named ‘enventory’
Step 3: Start XAMPP and start Apache and MySQL
Step 4: setting up root password for MySQL. This changes with XAMPP version so consult this for specific details.
OE Settings
CHANGING TIMEOUT FOR WRONG PASSWORD
Edit file lib_global_setting.php:
from
to
Turn On Import and Edit function for Chemical Containers
Add "Import and Edit" and "Import Only" options in the Settings menu for admin roles.
Requirements
Raspbian on Raspberry pi 3B
How to install open enventory on Raspbian
This guide is to create a working Open enventory running on OS Raspbian on a Raspberry pi 3B (see for information on the RPi 3B)
Quad Core 1.2GHz Broadcom BCM2837 64bit CPU
1GB RAM
Useful SQL commands
Below are some additional SQL commands that can give you some info that are not possible from inside Open Enventory
There are a lot more SQL commands in the following section:
CHANGING INFO OF MULTIPLE CHEMICALS
Install phpMyAdmin (See )
Other Supporting Programs for OE
SSH port
Password: use the mariadb password that was set up in step 5 of this tutorial
Step 5: Change php.ini content by clicking on Config button on the same row with Apache on XAMPP panel to match the following:
error_reporting = E_ALL & ~E_WARNING & ~E_NOTICE & ~E_STRICT & ~E_DEPRECATED (otherwise some warnings being displayed will break the functionality)
safe_mode=Off
magic_quotes_gpc=Off
upload_max_filesize=64M # (or higher)
post_max_size=64M # (or higher)
If still warnings appear in the generated HTML code (breaking open enventory), you should set:
display_errors=Off # (especially on PHP 7+)
Step 6: Change my.cnf (or my.ini) content by clicking on Config button on the same row with MySQL on XAMPP panel to match the following under [mysqld] section:
Step 7: Restart both Apache and MySQL service by clicking on Stop and then Start for each service.
"Database": <database-name>
"database-name" can be whatever you choose but should not have blank space and unique; I suggest short name is better as well.
"Username": root
(It has to be the exact word "root" for this set up first)
"Password": the root password that we set in the step above
Then click on "Inventory".
Step 9: If successful, it will bring up something similar to this page:
Example of display page after first successful login
If you are locked from login due to incorrect entries of username and password (for 30 min), find the file named “openenv.log” which you can find in a similar path given below:
C:\Users\sr\AppData\Local\Temp\ openenv.log
Open the file with any text editor program (Notepad), delete the content, save and restart XAMP and then try to access Open Enventory again (http://localhost/enventory/)
Copy the content of the folder into your current [OE_folder] and overwrite the old files
Copy the “List of files that have been modified to specific need (different than the original files of oe)” from the backed up OE to the new [OE_folder]
Restart httpd and mariadb (or mysqld) services
Go to web browser and access OE url
Login as root into a database of interest and perform upgrade if necessary (you will have to do this again for all of the databases if major upgrade is required
MULTIPLE LABEL STYLES
This will create n number of window for different styles of label when click on this Print Dymo Label button (). Also, this code will close these pop-up windows automatically after 30 seconds (30000 miliseconds)
Name these files as chemical_storage1.label, chemical_storage2.label, etc.
Save these files in the same location: /oe/forms/dymo/
Edit file edit.js (in /oe/lib/)
From:
To:
The code block above will show 2 labels in the popup window. You can add more label by copy the block for "Second label", make sure to change:
- variable name for the window (window2 in the example above)
- moveby specifications
Pic:
Original file:
Modified file:
2. Restart the apache service: in CentOS7 use this in the command line:
HAVING THE “PRINT DYMO LABEL” BUTTON ALWAYS SHOW UP REGARDLESS OF DYMO PLUGINS INTALLED
This will make this button () always show up even if the dymo plugin for browser is not detected.
3. Choose the Database in which the containers belong to:
For example in this case, I choose Database storage
Screen shot 2015-07-16 at 7
4. Create new storage location in OE as usual, see:
5. Identify the storage_id of the new and old locations by choosing Table storage in Database “xyz”.
Note: In this example, accidentally, the name of the database (“storage”) is the same as the name of the table. However, the database name can be anything but the table name is always “storage”
Another way of doing this is to use “Console” function in phpMyAdmin
Type in:
You should see similar to:
With the screen above, you should be able to see the storage_name and the corresponding storage_id
The next few steps is demonstration for changing all of the chemical in “315-R (Personal)” (storage_id=1) into “305-test” (storage_id=9)
In the Console:
6. To check how many chemical, type:
Note: hit Ctrl+Enter to execute command in Console
7. To change, type:
Done
CHANGING INFO OF MULTIPLE CHEMICALS
Install phpMyAdmin (See above)
To return all chemicals borrow by somebody (borrowed_by_person_id)
Look up person_id by going into [Database]/person
Show chemical borrow by that person (i.e. a person with person_id=8)
3. Return by:
To change the owner info of a chemical (owner_person_id)
Look up person_id by going into [Database]/person
Show chemical owned by that person (i.e. a person with person_id=7)
3. Change, in this case, to no owner (NULL)
Find person_id using Console command line in PHPMyAdmin
In the following example, show person_id of user with username=julia
Find storage ID using Console Command line in PHPMyAdmin
First choose the desired database on the tree folder from the left
Use:
Explain:
LIKE 'FH-2206%' : show the storage_id of the storage location with name starting with FH-2206
LIKE '%FH-2206%' would mean find anything with storage name containing FH-2206
LIKE 'FH-2206%' would mean find anything with storage name ending with FH-2206
Show chemicals with multiple criteria
Explain: the above command is used to
Select all of the chemical in the database that match: owner_person_id=15 AND with storage_id is NOT 18
Change Responsible person for chemicals with multiple criteria
Explain: see above for explanation of the criteria.
Show storage_name and storage_id using username
Explain:
GROUP BY storage_name : is added so that duplicates are only shown once
Update responsible person for chemicals in many location (storage)
Explain: the command above change responsible people to no one for all of the chemicals being owned by person_id=13 AND in all of the storage_id listed
Search for barcodes that are duplicated
The below command will search for all the barcode that is assigned to more than 1 container (chemical_storage). This search ignores disposed container as well as container without barcodes (chemical_storage_disabled IS NULL AND chemical_storage_barcode != "")
Update/Get extra info for containers with duplicated barcode (continued from “Search for barcodes that are duplicated”)
To select info from the list of duplicated barcodes. In this case, created by a specific user and created after some specific timestamp
REMOVE ALL CONTAINERS (BOTTLES) OF CHEMICALS
WARNING!!! BE VERY CAREFUL BEFORE DOING THIS!
This will remove all of the containers, including info about manufactures, order date, barcode, owner, location, etc. However, info about molecule (MW, structures, safety, etc) and database related such as users will be reserved.
This is particularly helpful when you need to update a large amount of chemicals via text import.
Login into your server via ssh
Login into myswl using root account or user account with administrator priviledge for the database that you want to change. Replace “root” with the username if desired
3. Show database and then choose the database of interest. test is the name of the database in this example
4. Remove the chemical container by running the following command
5. (Optional): Run the command below if you want to reset the id counter (chemical_storage_id as well as autogenerated barcode)
6. Log out of mysql, restart httpd and mariadb services
7. Go back to OE website and import new tab-separated text file
Update (Oct 11, 2019): new function to delete multiple containers based on barcode has been added into Settings section. Only users with admin permission would see this option.
SETTINGS FOR OE TO USE WITH EXISTING CONTAINER BARCODES
If you have existing barcodes for your chemical containers, use the following settings
Login into OE with the database that you want to modify, using an admin account, (or root account, or an account with sufficient permission)
Navigate to Settings/Global Settings/Inventory
Important: when switching to this setting, you have to generate your own storage(locations) barcodes as well as user barcodes. See below for way to automatically generate location and user barcodes.
TO FIX EXISTING BARCODE IMPORTED ISSUE: Removing trailing “\n” in existing barcodes
Issue: if the existing barcode column is the last column in the tab-separated text file, when imported into OE, the “\n” will also be imported as part of the barcode. This lead to terminal window does not work with existing barcode. Use the following methods to remove this trailing “\n” character
Login into your server via ssh
Login into mysql using root account or user account with administrator priviledge for the database that you want to change. Replace “root” with the username if desired
3. Show database and then choose the database of interest. “test” is the name of the database in this example:
4. Remove the chemical container by running the following command
5. Log out of mysql, restart httpd and mariadb services
TO AUTOMATICALLY ADD STORAGE BARCODE WHEN USING “USE EXISTING BARCODES”
Update (as of 2019-08-01, for Khoi’s modified version): functions “Autogenerate barcode” has been added into Settings for Admin roles. Users with admin permission can login into OE web interface, go to Settings/Autogenerate barcode and click the corresponding button to autogenerate storage and/or user barcodes.
Issue: when switching to using pre-existing barcode instead of using OE-generated barcodes, the system won’t work well if no existing barcode for storages and users are added. Use the code below in mysql to automatically add barcodes for storage using OE-generated code.
While these barcodes look the same, they have to be generated in order for terminal to work
Login into your server via ssh
Login into mysql using root account or user account with administrator privilege for the database that you want to change. Replace “root” with the username if desired
3. Show database and then choose the database of interest. “test” is the name of the database in this example:
4. You can check if the new generated barcode first by running this in phpMyAdmin (easier to see result). See explanation below for the complicated function. Compared the “new_barcode” with the autogenerated barcode to make sure the function work well.
5. Update the “storage” table, by setting “storage_barcode” field. “storage_barcode” field is a binary so cast() was used. Note, this whole function inside cast() is to convert “storage_id” field to EAN8 barcode. See here for more info on how to make EAN8 barcode: http://www.barcodeisland.com/ean8.phtml
Explain: default in OE, the barcode for storage is “92xxxxxy” with the last digit “y” (digit number 8 on 1-based) is the check sum of the first 7 digits. The “xxxxx” labeled in red is the “storage_id” left padded with “0” (number zero).
For example: if “storage_id”=1 => “storage_barcode”=92000018
Exit mysql:
TO AUTOMATICALLY ADD PERSON BARCODE WHEN USING “USE EXISTING BARCODES”
Update (as of 2019-08-01, for Khoi’s modified version): functions “Autogenerate barcode” has been added into Settings for Admin roles. Users with admin permission can login into OE web interface, go to Settings/Autogenerate barcode and click the corresponding button to autogenerate storage and/or user barcodes.
Issue: when switching to using pre-existing barcode instead of using OE-generated barcodes, the system won’t work well if no existing barcode for storages and users are added. Use the code below in mysql to automatically add barcodes for USER using OE-generated barcode.
While these barcodes look the same, they have to be generated in order for terminal to work
Login into your server via ssh
Login into mysql using root account or user account with administrator privilege for the database that you want to change. Replace “root” with the username if desired
3. Show database and then choose the database of interest. “test” is the name of the database in this example:
4. You can check if the new generated barcode first by running this in phpMyAdmin (easier to see result). See explanation below for the complicated function. Compared the “new_barcode” with the autogenerated barcode to make sure the function work well.
5. Update the “storage” table, by setting storage_barcode field. storage_barcode field is a binary so cast() was used. Note, this whole function inside cast() is to convert storage_id field to EAN8 barcode. See here for more info on how to make EAN8 barcode: http://www.barcodeisland.com/ean8.phtml
Explain: default in OE, the barcode for PERSON is “91xxxxxy” with the last digit “y” (digit number 8 on 1-based) is the check sum of the first 7 digits. The “xxxxx” labeled in red is the “person_id” left padded with “0” (number zero).
For example: if “person_id”=1 => “person_barcode”=91000019
6. Exit mysql:
SETTING TO ALLOW SEEING LOCATION OF CHEMICAL OUTSIDE YOUR OWN GROUP
In the default setting of OE, the exact location of a chemical belonging to a different group is masked. This setting will help you to allow some specific person or everyone to be able to see locations of chemicals outside of your own groups
Login into the server via ssh and then convert to root user or use sudo command. The following is using sudo command
It is a good idea to save an original copy of this file first. Modify the file lib_output.php inside open enventory folder. In this example, the open enventory folder is named “oe”. The specific location of your folder might change. Change the path accordingly.
3. Change the content of the file as follow. Note, this is on line 2584 so google to search for some term in vi; otherwise you will need to scroll a lot.
Original content:
To let EVERYONE see the locations:
To let a specific user to see the location, change the content as follow. In this example, the person name is “special_person”
Prepare the excel file with one column as storage with the same name as those found in OE. Export to csv file, csv file does not have to have the same column but it is best to have the first 2 columns is the storage name and barcode
Use mysql command line. ( if you use phpMyAdmin console, see section below)
Login into mysql as root user using:
2. Show all databases and choose the correct database to modify (in this example “test” is the name of the database):
3. Create a temporary table (in this example temp_storage is the name of the database, storage and barcode are the 2 headlines of the 2 columns):
4. Load csv data file into temp_storage table (in this example test is the name of the database; “ignore 1 lines” because the csv file head 1 line headline):
5. Update storage table
6. Remove the temporary table
If you want to use phpMyAdmin,
Copy csv files into /var/lib/mysql
Open phpMyAdmin console.
Choose the right databases
4. Run ALL of these commands AT ONCE (Ctrl-Enter to run command(s) in phpMyAdmin console)
This for KV's OE version on or later than March, 12, 2020.
You must have server access
Overview
"Import and Edit" option is similar to previous version of Import in which it allows admin users to import: chemical containers ("packages"), storages list, user list, and supplier offers. For chemical containers ("packages"), this function will check if the database has the chemicals based on provided barcode. If the barcode is not found, it will add new container. If the barcode is found, it will change the provided info for that container.
"Import Only": only allow importing of chemical containersAND it will NOT check for existing container.
Right now, this function will only turned on for MIT and Baylor University.
Instruction to turn on this function
To add your own institution, you need:
Creating lib_customization.your-school-name.php with your-school-name is short or abbreviation of your school name. Use lib_customization.mit.php for an example
Add the following line inside lib_customization.your-school-name.php after $default_g_settings["order_system"]="fundp";:
Modify lib_global_settings.php by:
Change this: define("customization",""); // Customization to use: f.e.: ".sample" for use of "lib_customization.sample.php", and "" for "lib_customization.php"
Modify sidenav.php by:
Right before this line: showSideLink(array("url" => "import_edit.php","text" => s("import_edit_tab_sep"), "target" => "mainpage", ));. On this line: if (in_array($g_settings["customization"], array("baylor", "mit"), true)) { add "your-school-name" (the same as "your-school-name" set in lib_customization.your-school-name.php
2. Once flashed insert micro SD into the RPi 3B and boot the device with monitor connected. If install completed you should now see the Raspbian desktop as shown below.
3. The first thing that should be done is to update the OS
open a terminal window by clicking on terminal icon on top bar or by pressing ctl+alt+t
Complete the steps to set up the Apache server, install PHP, and install MYSQL mysql is outdated trying the command in the above link will give you an error use the following instead to setup the mariadb and mysql (NOTE: Wordpress does not need to be installed)
5. Install the following packages to prepare for Open enventory
6. Create MYSQL root pwd by entering the following command in terminal the default password is blank. We will subsequently set it up so sudo is not required so that we can login online to create our databases for oe. When asked for a password after command 4, use the password we just set up for mysql_secure_installation.
7. Download Open Enventory image and set up on apache server (exact link to download can be found at https://sourceforge.net/projects/enventory/files/?source=navbar) (NOTE: in terminal commands below, the open_enventory_2019-07-24.zipshould be replaced with the version you wish to use)
- Once downloaded unzip and copy to the right location which we will need to make.
To find the ip address of your raspberry pi on your local network run the following command. The result will yield many things we only care about the ip address number directly following inet
going to servers address in a browser on a device on the local network will look like the following
Database: to create a new database, type the desired database’s name
Username: root
Password: use the mariadb password that was set up in step 6 of this tutorial
9. If successful after clicking inventory you should see the following page
10. Modify .htaccess file
Modify the content of the file as in this screenshot. Important: these settings are for the server with configuration as indicated in the top of this tutorial
Save the file by typing ctrl+o then hitting the enter key then exit by typing ctrl+x. You will then have to tell the raspberry pi to use the settings in the .htaccess file. Navigate to 000-default.conf and add add the Directory lines so that the file is identical to the image below.
Then restart the apache server
You are done with the initial set up here. Open Enventory is ready to be used at this time.
11. Note this can only be accessed on the local server if you wish to access the OE database on any network you can set up ngrok. If you sign up you can use the given link indefinitely, and using https://freedns.afraid.org/ you can make a DNS to access the database easily.
the output should look as follows (note if you close the terminal window the session will be closed
by navigating to the link provided by your output in a web browser with the directory oe for this example it would be http://2057a4d3.ngrok.io/oe should get you to the open enventory login page from any device on any network.
To return all chemicals borrow by somebody (borrowed_by_person_id)
Look up person_id by going into [Database]/person
Show chemical borrow by that person (i.e. a person with person_id=8)
3. Return by:
To change the owner info of a chemical (owner_person_id)
Look up person_id by going into [Database]/person
Show chemical owned by that person (i.e. a person with person_id=7)
3. Change, in this case, to no owner (NULL)
Find person_id using Console command line in PHPMyAdmin
In the following example, show person_id of user with username=julia
Find storage ID using Console Command line in PHPMyAdmin
First choose the desired database on the tree folder from the left
Use:
Explain:
LIKE 'FH-2206%' : show the storage_id of the storage location with name starting with FH-2206
LIKE '%FH-2206%' would mean find anything with storage name containing FH-2206
LIKE 'FH-2206%' would mean find anything with storage name ending with FH-2206
Show chemicals with multiple criteria
Explain: the above command is used to
Select all of the chemical in the database that match: owner_person_id=15 AND with storage_id is NOT 18
Change Responsible person for chemicals with multiple criteria
Explain: see above for explanation of the criteria.
Show storage_name and storage_id using username
Explain:
GROUP BY storage_name : is added so that duplicates are only shown once
Update responsible person for chemicals in many location (storage)
Explain: the command above change responsible people to no one for all of the chemicals being owned by person_id=13 AND in all of the storage_id listed
Search for barcodes that are duplicated
The below command will search for all the barcode that is assigned to more than 1 container (chemical_storage). This search ignores disposed container as well as container without barcodes (chemical_storage_disabled IS NULL AND chemical_storage_barcode != "")
Update/Get extra info for containers with duplicated barcode (continued from “Search for barcodes that are duplicated”)
To select info from the list of duplicated barcodes. In this case, created by a specific user and created after some specific timestamp
REMOVE ALL CONTAINERS (BOTTLES) OF CHEMICALS
WARNING!!! BE VERY CAREFUL BEFORE DOING THIS!
This will remove all of the containers, including info about manufactures, order date, barcode, owner, location, etc. However, info about molecule (MW, structures, safety, etc) and database related such as users will be reserved.
This is particularly helpful when you need to update a large amount of chemicals via text import.
Login into your server via ssh
Login into myswl using root account or user account with administrator priviledge for the database that you want to change. Replace “root” with the username if desired
3. Show database and then choose the database of interest. test is the name of the database in this example
4. Remove the chemical container by running the following command
5. (Optional): Run the command below if you want to reset the id counter (chemical_storage_id as well as autogenerated barcode)
6. Log out of mysql, restart httpd and mariadb services
7. Go back to OE website and import new tab-separated text file
Update (Oct 11, 2019): new function to delete multiple containers based on barcode has been added into Settings section. Only users with admin permission would see this option.
Find duplicated custom barcodes using SQL
This should be run on the database of interest, table chemical_storage
chemical_storage_disabled is NULL : to ignored disposed containers
Configurable Prefix Character #1 – A prefix ID can be added and assigned for data transmission. Use this code with a code byte sequence, on page 16–1, which represents the desired character.
3
Code Byte 1
4
Code Byte 7
5
Code Byte 5
6
Configurable Prefix Character #2 – Assigns a second configurable prefix character.
First: Make sure you have the your_site.com.conf file inside /etc/httpd/conf.d. Following the following website: ; For more elaborate see:
Optional, here is another way the step above can be set up (Note: this website set up a bit different than the one above, specifically, the above website use /etc/httpd/conf.d/ instead of /etc/httpd/sites-enabled):
danielromogroup.com and other sites on this server has been set up using /etc/httpd/conf.d/
8. Setting up owner of /var/www/html folders, to easy update website:
9. Creating groups, users; Assigning passwords:
Assinging password and require immediate pass change after log in:
Add Linux users to a group:
10. Force using https access using .htaccess:
11. Configure PHP to read .htaccess file on a CentOS 7 server
We need to modify the httpd.conf file:
In this file: after <Directory "/var/www/html">, modify AllowOverride None to AllowOverride Options.
Save the file (hit Esc, type :wq and then Enter)
Restart httpd service:
12. Dreamweaver:
Creating Template:
13. Setting up firewall for CentOS 7:
DON’T FORGET TO OPEN PORT 7822 FOR SSH WHILE USING A2 SERVER
If forgot to open port 7822, follow this link:
14. MySQL/MariaDB
Error that need to change packet size:
15. Installing phpMyAdmin
16. Working with tar files
17. Setting up multiple websites with multiple domains on the same server
On current A2 hosting, the server config can be found in /etc/httpd/conf/httpd.conf
Setting up multiple Let’sEncrypt certificates for multiple hosts on the same server: (this is for Ubuntu)
After that use “/usr/local/sbin/certbot --apache -d example.com -d ” . The content of site2.com.conf file will be automatically changed. Here is example of the content of site2.com.conf after running the “certbot-auto…”
Read here for more info about a set up a conf file for SSL certificate:
18. Working with WordPress
Initial Install:
From A2:
WP security, from A2 hosting:
19. Setting up Booked Scheduler
See here for official guide:
Note: when change the info in the config.php file, make sure to change the:
Install password
Find Missing SDS
This program is designed specifically for Open Enventory to fix issue with molecule missing sds (could not be extracted through "Read data from supplier") This programs does:
Copy/extract Open Enventory into Applications/XAMPP/htdocs/ . Write down the folder name because this will be the web address. In this case the folder is named ‘open_enventory’
3. Open Applications/XAMPP manager. Start MySQL and Apache.
4. Change mysql root password by following these steps:
Ensure that the MySQL/MariaDB server is running. (see step 3)
Open a new terminal.
Use the mysqladmin command-line utility to alter the MySQL/MariaDB password, using the following syntax:
mysqladmin --user=root password "newpassword"
5. Test that your password change has been accepted, by attempting to connect to the MySQL/MariaDB server using the mysqlcommand-line client in the same directory. For example, you could use the command below to connect to the server and return the results of a calculation: (make sure you use your own password instead of “gue55me”)
Steps 6 & 7 are for phpmyadmin set up. They are optional. You don’t need to do this if you just want to set up Open Enventory
6. Change the permission for Applications/XAMPP/xamppfiles/phpmyadmin so that you/your_account have the read and write access, through right click, Get Info (or Cmd-I)
7. Use TextEdit to edit file config.inc.php. Locate:
$cfg['Servers'][$i]['auth_type'] = 'config';
and change to:
$cfg['Servers'][$i]['auth_type'] = 'cookie';
8. Using a web browser, go to:
In Database: put in the name for your database server
Log in with username ‘root’ and set password
Notice the error messages
9. Under Warning above notice the place of the temp folder (in this case /var/folders/87/…)
10. Go to that folder containing the openenv.log (in this case: T with the path as following in Finder (file maybe hidden):
/var/folders/87/b98_ym4x1r91ldysmq8r29kc0000gn/T/
11. Set permission for everyone to Read&Write for this folder (e.g. “T”)
12. Look-up file php.ini. Should be in Applications/XAMPP/xamppfiles/etc/
And change to:
error_reporting=E_ALL & ~E_NOTICE
13. Restart Apache and SQL in XAMPP manager
14. Restart the web browser and go the server website at:
- In Database: put in the name for your database server
- Log in with username ‘root’ and set password
CHANGE TIME ZONE
Edit php.ini with TextEdit:
Path: /Applications/XAMPP/xamppfiles/etc/php.ini
Change:
date.timezone=Europe/Berlin
to:
date.timezone=America/Chicago
Restart server
CHANGE LOGIN DEFAULT DATABASE TO NONE
Edit lib_global_funcs.php with TextEdit:
Path: /Applications/XAMPP/xamppfiles/htdocs/open_enventory/
Change:
if ($db_name=="") {
    $db_name="storage";
to:
if ($db_name=="") {
    $db_name="";
2. Restart server
SAVE/ BACK-UP and RESTORE DATABASE
See this page:
Find Missing Structure
This program is designed specifically for Open Enventory to fix issue with molecules missing structures (could not be extracted through "Read data from supplier")
Docker Build
Overview
You can quickly have a container (virtual machine) up and running Centos 7 and LAMP stack by using this Docker Image, see link below to download the docker image and quick instruction. If you have more questions, please feel free to contact KV.
Details
In order to use this image, you need to:
1. Install Docker Community Edition (CE):
2. Go to this link and get the download link
OR download the docker image:
3. Follow the instruction in the Docker hub link above to get the container running
4. Download Open Enventory and put the content inside html folder inside the project folder created by following the instruction of the Docker image.
Hosting Server Related
CHANGE TIME ZONE
Edit php.ini file (/Applications/XAMPP/xamppfiles/etc/php.ini if you use XAMPP in MacOS)
Change:
to:
2. Restart server
SETTING UP HTTPS (SECURED HTTP) FOR OE (RECOMMENDED)
This is optional but recommend for any site that requires user login
This specifically apply to:
CentOS 7
Follow the instruction in this website to install and enable ssl:
Ignore Step 3 in the tutorial above
2. Create /etc/httpd/conf.d/oe.conf (same name as the folder contain Open Enventory, in this case /var/www/html/oe)
In Terminal, type:
Add the content below:
All of these below info (highlighted in red can be change to match specific ip address as well as document location:
ServerName your_url.net
DocumentRoot /var/www/html/oe
2. Restart apache service, in Terminal:
SETTING UP CRONTAB TO AUTOMATICALLY BACKUP YOUR DATABASE
This is optional but recommend for auto back up the OE database as well as the user’s info and password
This specifically apply to: CentOS 7 (Apache version: Apache/2.4.6 (CentOS) OpenSSL/1.0.1e-fips PHP/5.5.25
PHP version: 5.5.25
MySQL server version: 5.5.41-MariaDB)
Set up sshpass to automatically pass the password. Note: this is not ultrasafe but it is simple. Check out this link:
(only need to follow how to install, step 1)
Go into Terminal in your server and log in as root user (type: “su” and then password at the command line
Note: you can do the rest of the command lines below with prefix “sudo your-command-here” if you don’t want to log in as root
3. At the command line, type:
4. When the file is open, insert the following. Note: everything is red can be changed to match specific details. -$(date +\%Y\%m\%d): is used to set automatic date
5. More example of crontab can be read here:
OPTIMIZING CENTOS 7 PERFORMANCE
IP BLOCKING FOR SECURITY ENHANCEMENT ON CENTOS 7 SERVER
This guide to use access_log to find out some high frequent access ip and then check them manually and form a block ip if necessary
Find IP address with the most access
Follow this: , first answer
Specifically, ssh into the server and then log in as root user
Use following command:
change “-20” to “-xx” with “xx” is the number of result. This is sort from most to least access request
4. Google any ip lookup website and check these IPs(e.g: ). If find any suspicious ones, you can add a rule to block those ip network address by the next step
Setting up rule to block ip network.
Follow this guide:
Finding info about the network list
Follow this guide:
Specifically using this command (after ssh into the server and then log in as root)
To list the IP sets known to firewalld in the permanent environment, use the following command as root:
3. To get more information about the IP set, use the following command as root: (in the example below, “test” is the name of ipsets you got from the above command
Or:
To see the extended entries list of the IP set, use the following command as root:
To block IP from a whole country
Follow this guide:
FREEING DISK SPACE IN CENTOS 7
See these references:
ADVANCE FILE AND FOLDER PERMISSION/OWNERSHIP SETTING IN CENTOS 7
See the following resources:
Good and comprehensive:
Simple preservation of parent folder group owernship for all files newly created:
Versions
Below is info for changes that are made for OE in KV's github: https://github.com/khoivan88/open_enventory-modified_for_US
2020-09-26
Add: option for borrowing of chemicals by users from outside of the group (guests)
sql_mode = NO_ZERO_IN_DATE,NO_ZERO_DATE,ERROR_FOR_DIVISION_BY_ZERO,NO_AUTO_CREATE_USER,NO_ENGINE_SUBSTITUTION
max_allowed_packet = 64M # (or higher)
innodb_buffer_pool_size = 1024M # to about 50% of the available memory
systemctl restart httpd mariadb
[mysqld]
sql_mode = NO_ZERO_IN_DATE,NO_ZERO_DATE,ERROR_FOR_DIVISION_BY_ZERO,NO_AUTO_CREATE_USER,NO_ENGINE_SUBSTITUTION
max_allowed_packet = 64M # (or higher)

innodb_buffer_pool_size = 1024M # to about 50% of the available memory
innodb_log_file_size = 128M # to about 10% of the available memory
function printDymoLabel() {
    var url="editWin.php?mode=print_label&table="+table; window.open(url,Number(new Date()),"height=450,width=300,scrollbars=yes");
}
function printDymoLabel() {
    // First label:
    var url="editWin.php?mode=print_label&table=chemical_storage1";
    var window1=window.open(url,Number(new Date()),"height=300,width=200,scrollbars=yes");
    setTimeout(function(){ window1.close() }, 30000); // this will automatically close this pop-up window in 30s;

    // Second label:
    var url="editWin.php?mode=print_label&table=chemical_storage2";
    var window2=window.open(url,Number(new Date()),"height=300,width=200,scrollbars=yes");
    window2.moveby(400,0); // this will move this window to the right, same vertical height so that it does not overlap the previous window;
    setTimeout(function(){ window2.close() }, 30000); // this will automatically close this pop-up window in 30s;
}
sudo systemclt restart httpd.service
case "dymo":
    $retval.="<a id=\"dymo\" href=\"javascript:void(0);\" class=\"imgButtonSm\" title=".fixStr(s("print_dymo_label"))." style=\"display:none\" onClick=\"….
case "dymo":
    $retval.="<a id=\"dymo\" href=\"javascript:void(0);\" class=\"imgButtonSm\" title=".fixStr(s("print_dymo_label"))." onClick=\"…
SELECT * FROM storage
SELECT * FROM chemical_storage WHERE storage_id=1
UPDATE chemical_storage SET storage_id=9 WHERE storage_id=1
SELECT * FROM chemical_storage WHERE borrowed_by_person_id=8
UPDATE chemical_storage SET borrowed_by_person_id=NULL WHERE borrowed_by_person_id=8
SELECT * FROM chemical_storage WHERE owner_person_id=7
UPDATE chemical_storage SET owner_person_id=NULL WHERE owner_person_id=7
SELECT person_id FROM person WHERE username='julia'
SELECT storage_id FROM storage WHERE storage_name LIKE 'FH-2206%'
SELECT * FROM chemical_storage
WHERE owner_person_id=15 AND storage_id NOT LIKE 18
UPDATE chemical_storage
SET owner_person_id='NULL'
WHERE owner_person_id=15 AND storage_id NOT LIKE 18
SELECT storage_name,storage_id
FROM storage
WHERE storage_id IN
    (SELECT storage_id
     FROM chemical_storage
     WHERE owner_person_id in
         (SELECT person_id FROM person WHERE username='mingzhao')
     )
GROUP BY storage_name
UPDATE chemical_storage
SET owner_person_id=null
WHERE owner_person_id=13 AND storage_id IN (19,7,5,4,12,8)
SELECT chemical_storage_barcode
FROM chemical_storage
WHERE chemical_storage_disabled IS NULL AND chemical_storage_barcode != ""
GROUP BY chemical_storage_barcode
HAVING Count(*) > 1;
SELECT molecule_id,
        chemical_storage_id,
        chemical_storage_created_when,
        chemical_storage_created_by,
        chemical_storage_barcode
FROM chemical_storage
WHERE chemical_storage_barcode IN
    (SELECT chemical_storage_barcode
     FROM chemical_storage
     WHERE chemical_storage_disabled IS NULL AND chemical_storage_barcode != ""
     GROUP BY chemical_storage_barcode
     HAVING Count(*) > 1
    ) AND
    chemical_storage_created_by = "user1" AND
    chemical_storage_created_when > '2019-08-16 18:00:00'
ORDER BY chemical_storage_barcode;
UPDATE chemical_storage
SET chemical_storage_barcode=trim(trailing cast("\n" as binary)
FROM chemical_storage_barcode);
exit
systemctl restart httpd mariadb
mysql –u root -p
show databases;
use test;
select storage_name, storage_id,
concat(concat(92, lpad(storage_id, 5, 0)),
(10 - ((9*3 + 2 +
substring(cast(concat(92, lpad(storage_id, 5, 0)) as char), 3, 1)*3 +
substring(cast(concat(92, lpad(storage_id, 5, 0)) as char), 4, 1)*1 +
substring(cast(concat(92, lpad(storage_id, 5, 0)) as char), 5, 1)*3 +
substring(cast(concat(92, lpad(storage_id, 5, 0)) as char), 6, 1)*1 +
substring(cast(concat(92, lpad(storage_id, 5, 0)) as char), 7, 1)*3
) % 10)
) % 10)
as new_barcode from storage;
update storage
set storage_barcode=cast(
concat(concat(92, lpad(storage_id, 5, 0)),
(10 -
((9*3 + 2 +
substring(cast(concat(92, lpad(storage_id, 5, 0)) as char), 3, 1)*3 +
substring(cast(concat(92, lpad(storage_id, 5, 0)) as char), 4, 1)*1 +
substring(cast(concat(92, lpad(storage_id, 5, 0)) as char), 5, 1)*3 +
substring(cast(concat(92, lpad(storage_id, 5, 0)) as char), 6, 1)*1 +
substring(cast(concat(92, lpad(storage_id, 5, 0)) as char), 7, 1)*3
) % 10
)
) % 10)
as binary)
where storage_barcode is NULL or storage_barcode='';
exit;
mysql –u root -p
show databases;
use test;
select username, person_id,
        concat(concat(91, lpad(person_id, 5, 0)),
                (10 -
                 ((9*3 + 1 +
                  substring(cast(concat(91, lpad(person_id, 5, 0)) as char), 3, 1)*3 +
                  substring(cast(concat(91, lpad(person_id, 5, 0)) as char), 4, 1)*1 +
                  substring(cast(concat(91, lpad(person_id, 5, 0)) as char), 5, 1)*3 +
                  substring(cast(concat(91, lpad(person_id, 5, 0)) as char), 6, 1)*1 +
                  substring(cast(concat(91, lpad(person_id, 5, 0)) as char), 7, 1)*3
                   ) % 10)
                ) % 10
               )
as new_barcode from person;
update person
set person_barcode=cast(
                      concat(concat(91, lpad(person_id, 5, 0)),
                               (10 -
                                 ((9*3 + 1 +
                                   substring(cast(concat(91, lpad(person_id, 5, 0)) as char), 3, 1)*3 +
                                   substring(cast(concat(91, lpad(person_id, 5, 0)) as char), 4, 1)*1 +
                                   substring(cast(concat(91, lpad(person_id, 5, 0)) as char), 5, 1)*3 +
                                   substring(cast(concat(91, lpad(person_id, 5, 0)) as char), 6, 1)*1 +
                                   substring(cast(concat(91, lpad(person_id, 5, 0)) as char), 7, 1)*3
                                   ) % 10)
                               ) % 10) as binary
                       )
where person_barcode is NULL or person_barcode='';
exit;
vi /var/www/html/oe/lib_output.php
lib_output.php
case "storage":
    if ($row["db_id"]==-1
    || $g_settings["order_system"]=="fundp" // fundp wants all to see the exact location
    || $db_user == ROOT) {
        $retval=joinifnotempty(
            array($row["storage_name"],
            ifnotempty(s("compartment_short")." ",$row["compartment"]) // Fach X
            )
        );
    }
    else {
        $retval=$row["show_db_beauty_name"];
    }
lib_output.php
 case "storage":
     if ($row["db_id"]==-1
     || $g_settings["order_system"]=="fundp" // fundp wants all to see the exact location
     || $db_user == ROOT) {
         $retval=joinifnotempty(
             array($row["storage_name"],
             ifnotempty(s("compartment_short")." ",$row["compartment"]) // Fach X
             )
         );
     }
     else {
    // $retval=$row["show_db_beauty_name"]; // Uncomment this and comment out the rest of the block to return to default behavior
         $retval=joinifnotempty(
             array($row["storage_name"],
             ifnotempty(s("compartment_short")." ",$row["compartment"]) // Fach X
             )
         );
     }
lib_output.php
case "storage":
    if ($row["db_id"]==-1
    || $g_settings["order_system"]=="fundp" // fundp wants all to see the exact location
    || $db_user == ROOT
    || $db_user == "special_person") { //this is to add some person to be able to the see the location
        $retval=joinifnotempty(
            array($row["storage_name"],
            ifnotempty(s("compartment_short")." ",$row["compartment"]) // Fach X
            )
        );
    }
    else {
        $retval=$row["show_db_beauty_name"];
    }
    break;
sudo mysql_secure_installation
sudo service apache2 restart
sudo service mariadb restart
sudo mysql -u root -p
MariaDB [(none)]> USE mysql;
MariaDB [mysql]> UPDATE user SET plugin='mysql_native_password' WHERE User='root';
MariaDB [mysql]> FLUSH PRIVILEGES;
MariaDB [mysql]> exit;
sudo service mariadb restart
SELECT * FROM chemical_storage WHERE borrowed_by_person_id=8
UPDATE chemical_storage SET borrowed_by_person_id=NULL WHERE borrowed_by_person_id=8
SELECT * FROM chemical_storage WHERE owner_person_id=7
UPDATE chemical_storage SET owner_person_id=NULL WHERE owner_person_id=7
SELECT person_id FROM person WHERE username='julia'
SELECT storage_id FROM storage WHERE storage_name LIKE 'FH-2206%'
SELECT * FROM chemical_storage
WHERE owner_person_id=15 AND storage_id NOT LIKE 18
UPDATE chemical_storage
SET owner_person_id='NULL'
WHERE owner_person_id=15 AND storage_id NOT LIKE 18
SELECT storage_name,storage_id
FROM storage
WHERE storage_id IN
    (SELECT storage_id
     FROM chemical_storage
     WHERE owner_person_id in
         (SELECT person_id FROM person WHERE username='mingzhao')
     )
GROUP BY storage_name
UPDATE chemical_storage
SET owner_person_id=null
WHERE owner_person_id=13 AND storage_id IN (19,7,5,4,12,8)
SELECT chemical_storage_barcode
FROM chemical_storage
WHERE chemical_storage_disabled IS NULL AND chemical_storage_barcode != ""
GROUP BY chemical_storage_barcode
HAVING Count(*) > 1;
SELECT molecule_id,
        chemical_storage_id,
        chemical_storage_created_when,
        chemical_storage_created_by,
        chemical_storage_barcode
FROM chemical_storage
WHERE chemical_storage_barcode IN
    (SELECT chemical_storage_barcode
     FROM chemical_storage
     WHERE chemical_storage_disabled IS NULL AND chemical_storage_barcode != ""
     GROUP BY chemical_storage_barcode
     HAVING Count(*) > 1
    ) AND
    chemical_storage_created_by = "user1" AND
    chemical_storage_created_when > '2019-08-16 18:00:00'
ORDER BY chemical_storage_barcode;
SELECT chemical_storage_id, chemical_storage_barcode, count(chemical_storage_barcode) as NumOccurrences
from `chemical_storage`
WHERE chemical_storage_disabled is NULL
GROUP BY chemical_storage_barcode
HAVING (COUNT(chemical_storage_barcode) > 1)
To:
define("customization",".your-school-name"); // Customization to use: f.e.: ".sample" for use of "lib_customization.sample.php", and "" for "lib_customization.php"
. Notice there is a
period
(
.
) in front of "your-school-name".
) right at the end of the array list of institutions. For example:
 /* Khoi: add customization identifier so that codes specific for your-school-name will be execute. Only change if you know what you are doing */
 $default_g_settings["customization"]="your-school-name";
if (in_array($g_settings["customization"], array("baylor", "mit", "your-school-name", ), true)) {
For CentOS, generate two #.conf files in /etc/httpd/conf.d/. For example: /etc/httpd/conf.d/site1.com.conf and /etc/httpd/conf.d/site2.com.conf. Each conf file is the apache set up for the site. Example of the content of site2.com.conf:
UpdraftPlus Plugin is used to back up WordPress. To restore Wordpress
Create a fresh install of wordpress as in the link above
Install Updraftplus plugin
Load the backup files
Restore
If there is issue after restore, check here first. A common issue is the rewrite link issue (Wordpress Permanet link), follow the solution in “Using ‘Pretty’ permalinks” in this link:
The mysqladmin command-line utility is located within the bin/ subdirectory of the XAMPP installation directory, typically /Applications/XAMPP.
For example, to change the MySQL/MariaDB root password from its default empty value to the password gue55me, you would execute:/Applications/XAMPP/bin/mysqladmin --user=root password "gue55me"
Or, if a password has already been previously set and you’d like to change it to a new one, you can use the following syntax:
mysqladmin --user=root --password=oldpassword password "newpassword"
For example, to change the root password from 12345 to gue55me, you would execute:
/Applications/XAMPP/bin/mysqladmin --user=root --password=12345 password "gue55me"
Details: The idea is each group should have one ‘user’ account designated for external users (users from outside of the group, guests). When someone outside of the group comes and borrows a chemical containers, this account barcode should be scanned and following by the container barcode. This specific account (made by turning on a specific permission setting External borrow in Predefined permission) is set so that during checking out of a chemical container by this account, a pop-up window would open and ask for the specific info (borrower’s name, group, contact info, and the group member assisting during checkout). This info is then saved into the history entry of that exact checkout event.
To use this function:
Create a new user, some thing like ‘guests_<database_name>’ for example.
While creating this user, choose the following ‘External borrow’ in the ‘Predefined permissions’
Choosing 'External borrow' in 'Predefined Permissions' for guests account
3. Use this new account in the OE barcode terminal. During checkout, a popup window like this should open to ask for more info:
Popup window asking for more info during checking out of a chemical container by an external user
2020-09-24
Add: Select2 javascript library to give users a customizable select box with support for searching, filtering. This change is for Inventory mode.
Customized 'Search' select box to allow for easy searching and filtering of search criteria
2020-09-10
Change: allow username to be up to 32 character
2020-08-18
Add yyyy-mm-dd date format for import chemicals from Excel file
Change to import function to take user input name as the default name of the new molecule (if the molecule does not yet exist)
2020-08-03
Merge with Felix v2020-07-27. Noticeable changes include:
2020-07-27:
date format localized, depending on language of user
added missing suppliers, Sigma and Oakwood fixed
minor fixes
2020-07-13:
added the option to import experiments from . Read more about
and to upload lab notebook entries including spectra - much better than just supporting info
2020-06-19
Add ability to sort by 'order_date' in 'chemical_storage' table
2020-06-06
Add ChemDraw JS into drawing tools for both Inventory and ELN. To use it:
You need to obtain the ChemDrawJS license from ChemDraw support. You should be able to obtain Chemdraw JS license if your department/institution has site license for ChemOffice Professional, according to this.
After you obtain the ChemDraw JS license file, rename it to "ChemDraw-JS-License.xml" if neccessary and put that file into
Turning on ChemDraw as your drawing tools by going into Settings > Personal settings > Molecule editing (for your own preference) or Settings > Global settings > Molecule editing (for your whole database setting) and change Structure drawing program and Structure drawing program for reactions.
2020-05-17
Add function to extract currency when it is in front of the amount
Merge with Felix Rudolphi Official Release of OE-2020-05-03
Fix TCI scraping due to its new website
Fix: buttons size in Lab Notebook side
Fix: Ketcher window size in Inventory and ELN sides
Fix: bug preventing showing of "Print DYMO label" button (Reported by Gaël De Leener, PhD, Université libre de Bruxelles, Belgium. Thanks, Gaël!)
Fix "Reset" button in rxnSearch in ELN
Fix wrong Tooltip for some "Reset" buttons
Fix some English translation
Fix PHP7 Warning: count()
The following features are from Felix Rudolphi:
Fix: Ketcher 1.0 bug
Add: ChemDoodleWeb drawing 9.1.0 for both Inventory and ELN
2020-04-24
Fix: typo cause PHP Warning "Illegal String offset"
Fix: error in "Import and Edit" chemical containers where it rejects containers without CAS and name even if barcode existed.
2020-03-12:
Fix for search by container barcode for customized barcode starts with '2'. Why: some users has reported in the case of customized chemical barcodes, for example '10001' or '11345' or '22069'. When searching using barcodes, all of those starts with '1' works fine but those starts with '2' don't return the correct result. This is because the automatically generated barcode by OE starts with '2' and in the code, all search query for barcode starts with '2' will be modified
Add "Import and Edit" and "Import Only" options in the Settings menu for admin roles.
"Import and Edit" option is similar to previous version of Import in which it allows admin users to import: chemical containers ("packages"), storages list, user list, and supplier offers. For chemical containers ("packages"), this function will check if the database has the chemicals based on provided barcode. If the barcode is not found, it will add new container. If the barcode is found, it will change the provided info for that container.
"Import Only": only allow importing of chemical containersAND it will NOT check for existing container.
Right now, this function will only turned on for MIT and Baylor University.
To add your own institution, you need:
Creating lib_customization.your-school-name.php with your-school-name is short or abbreviation of your school name. Use lib_customization.mit.php for an example
2020-02-01:
Add support for importing/deleting from Excel files (both .xlsx and xls).
Add support for importing/deleting from csv (comma-separated text) files. Previously, only tab-separated text files are supported
2019-11-22:
Changed default criterion to "contains" instead of "is similar to" in Structure search
Made sidenav width resizeable for user that use Bootstrap4
Made sidenav width automatically expand in Structure search
Change format message in Terminal Mode to be more visible
Change 'User Guides' to direct to gitbook ()
2019-09-30:
Added:
Storage barcode and person barcode columns in their respective setting pages
Option to shorten the criteria list in Simple search in Inventory
(developed for Baylor University)
Placeholder for input type date in edit mode with yyyy-mm-dd
Function to delete multiple containers via import text
User guides section
Added 'liters' and 'liter' to the list of recognizing units when importing text file
Upgraded:
Updated ChemDoodle to ChemDoodleWeb Component v8.0.0
Upgraded Ketcher to v1.1-beta
Fixed:
Let the cursor default to be in 'Database' input field on login page,
fix for Firefox
Fixed bug where date are deleted in edit mode
2019-07-29:
Fixed Sigma-Aldrich cannot be accessed from A2 Hosting
Fixed changed location inside normal OE window does not record in History text
Added storage barcode for export functions
Added user barcode for export functions
Added show column for storage
Added show column for user
Fixed minor issue with "Disposed chemicals" list does not show correct view
Applied changes from official OE version 2019-07-24
2019-07-17:
Added date style to yyyy-mm-dd hh:mm:ss when display in OE so there is no confusion in date style
Added a new login page with mobile responsive
Modified sidenav, topnav to use Bootstrap4
Added option for admin user to turn Bootstrap 4 option on/off in global_settings
2019-07-03:
fixed bug in Terminal mode: barcodeTerminalAsync.php and lib_language_en.php
while doing inventory for a container (inventory mode or "Set storage for all following containers"), if you scan a non-existing barcode, the location will be removed. When a non-existent barcode is scanned, an error pop-up window appears.
modified History log text to add storage_name; also added History log text
when changing storage in edit mode (lib_db_manip.php, lib_db_manip_edit.php)
2019-06-11:
import.php, lib_import.php: added importing function for locations and users using tab-separated text file
lib_import.php: fix for importing chemical_storage_barcode bug.
When import tab-dilimited text file of chemical containers, if the barcode column is the last column, it will add white space or \n character, making the barcodes inaccurate. The fix will trim all the white space \t\n on the right side of the input column
topnav.php, style.css.php, lib_global_funcs.php, lib_sidenav_funcs.php sidenav.php: edited some fonts, styles
#This is to back up the Romo's OE database into home/khoi/OEbackup, every day at 00:05 am
5 0 * * * mysqldump -u root –pyour-password romo > /home/khoi/OEbackup/romo-backup-`date +"%Y%m%d"`.sql

#This is to back up the user table in mysql in order to save users' password, every day at 00:10 am
10 0 * * * mysqldump -u root -pyour-password mysql user > /home/khoi/OEbackup/romo-backup-user`date +"%Y%m%d"`.sql

#This is to copy the back up file to External harddrive, every day at 00:15 am
15 0 * * * sshpass -p your-password rsync -ave ssh --ignore-existing /home/khoi/OEbackup/ daniel@romomacpro.ddns.net:/Users/daniel/Documents/OEbackup/

#This is to delete the file every month
0 0 * * */4 rm -r /home/khoi/OEbackup/romo-backup-*.sql
Add the following line inside lib_customization.your-school-name.php after $default_g_settings["order_system"]="fundp";:
Modify lib_global_settings.php by:
Change this: define("customization",""); // Customization to use: f.e.: ".sample" for use of "lib_customization.sample.php", and "" for "lib_customization.php"
To: define("customization",".your-school-name"); // Customization to use: f.e.: ".sample" for use of "lib_customization.sample.php", and "" for "lib_customization.php". Notice there is a period (.) in front of "your-school-name".
Modify sidenav.php by:
Right before this line: showSideLink(array("url" => "import_edit.php","text" => s("import_edit_tab_sep"), "target" => "mainpage", ));. On this line: if (in_array($g_settings["customization"], array("baylor", "mit"), true)) { add "your-school-name" (the same as "your-school-name" set in lib_customization.your-school-name.php) right at the end of the array list of institutions. For example:
 /* Khoi: add customization identifier so that codes specific for your-school-name will be execute. Only change if you know what you are doing */
 $default_g_settings["customization"]="your-school-name";
if (in_array($g_settings["customization"], array("baylor", "mit", "your-school-name", ), true)) {